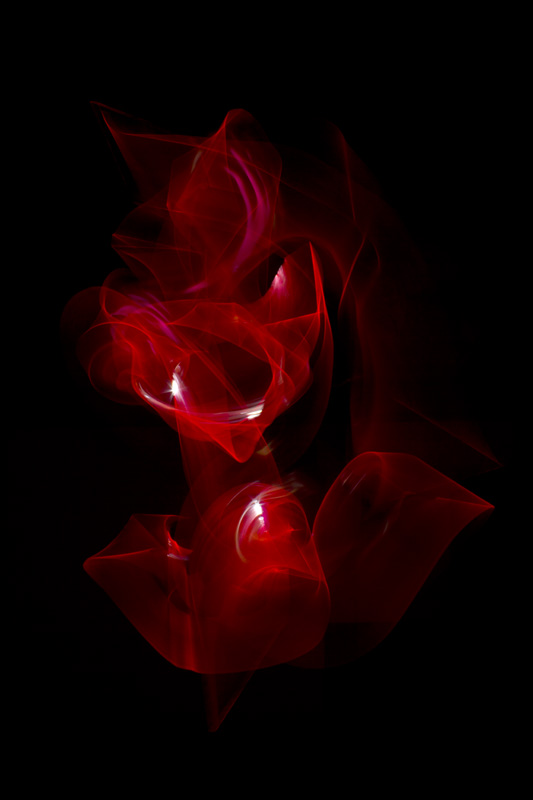
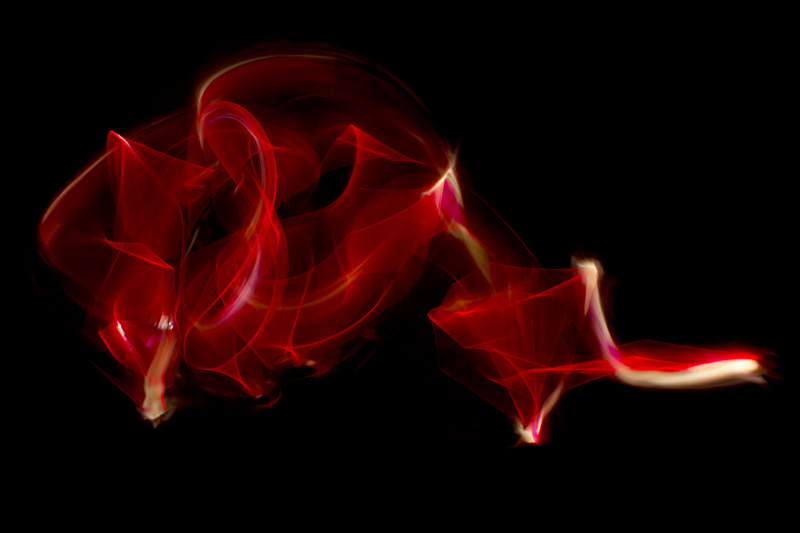
For my Light project, I found it quite fun to do because it's using light to experiment with and create different photographs and also using the computer to create light effects, for example using Glow Doodle online to create interesting light and movement patterns and using photoshop to create lines and using the different options in Photoshop to make it look like it done as a light painting and therefore, creating articfical light as it's 'forcing' light in a pattern that could've taken time or overlaying of the light.
I have found this project to have some easy ideas to it and some that were slightly time consuming because of how to set up all the equipment when it would've been easy to just point and shoot with a digital. But with this way of taking photos, most of them would've not come out in focus and they would've turned out blurry.
I was inspired by the work of Patrick Rochon, who uses light to create different effects and moods by using different type of lights and creating a whole unique world using Fashion and light together. Also, he had inspiration from the smallest things like men who were covered head to toe in white paint and they had the light coming of them. Also, I looked at the work of Pablo Picasso and saw how he used light to create surrealist art work and give different forms of photo. Also, it shows the modern approach that Picasso took to creating art work. I looked at the work of Joseph Holmes and I found it interesting and the way that he's captured the landscapes with natural light of the scenery. I have tried this myself with a Digital camera and the results that I got were really nice and I captured a soft light of the sun shining over Ashtead Common because of the frost that was also in the air helped cast the soft light. So it was natural soft light that was the result.
The things that I would give more time to is when using photoshop to create 'Artificial' light on a picture using layers and different sort of hue & saturations. I would give more time to this because it was hard to listen to all of the tutorial and try to keep up with the steps. But once I knew the basic steps it was simple to do and I got some good results out of using this way of creating fake light on top of an original photo.
Tuesday, 17 January 2012
Tuesday, 10 January 2012
My test strips
 |
| Still life test strip (1) |
 |
| Still life test strip (2) |
The first test strip went nearly all black and this showed that none of the first times was correct. In the end, I had to go with a guess that was aided by the light area on the right of the photograph and the dark greyish area that was next to the only light/ light grey area on the test strip.
The second test strip gave more variety to the lightness of the photograph and helped me choose a correct time more easily than the first one did because there is a graduated lightness before turning black so I roughly knew that the time would be a short time but I also had to figure out if I needed to put on filters or not to get the right image up. It only went grey towards the left of the page but this didn't matter because I felt that the lightness helped pick out the correct time for the exposure.
 |
| Still life outcome |
Contact Sheet
 |
| Contact Sheet of my negatives |
I think that this was the best one that came out but I would have preferred it to be lighter so that I could see the other pictures nearer the left of the contact sheet so that it stayed dark to give some contrast, but at-least then I would have seen the detail in the negative images.
Monday, 9 January 2012
Analysis of one of Patrick Rochon's work
This light painting was by Patrick Rochon, using different coloured lights and a long exposure time on a camera, either SLR or Digital. Light painting is a new and creative way to decorate pictures that would be otherwise dull and simple. This is the new way of making images bright and eye-catching and something for new artists to have a go at because it's not only Photography but is Art in the way they are 'Painting' over an image. Patrick Rochon's work is quite modern so it's relevant to todays environment.
There is a sense of space in this Picture because the car is in the middle of the page with the surrounding area being black. The lights are quite bright, as if to create the effect of wind blowing over the top of the car. This is effective because the the lights also reflect of the car bonnet, highlighting the front of the car and leaving the rest of the car to fade to the blackness. The picture is big itself is quite big as the car in the middle is quite big. If the car was smaller, then the artwork would be condensed and not as effective because the lights are making the car look elongated and longer than it really could be. The colour is quite bright compared the background to obviously be able to be seen and effective the same time.
This work seems to be a landscape Photo and also, the theme could be cars and making advertising/ branding more effective and eye-catching like in the Honda Advert that Patrick Rochon did because it shows a false image that cars can go through light and create these light sources that are just really light painted over the top of the object.
I like this painting by Patrick Rochon because it's quite simple yet it's effective because of the colours that he has used over a dull object (In my opinion) and using a black background gives the effect that it's just coming out of the darkness to be surrounded with light and joyfullness. Also, it looks like it has been elongated and stretched past it's usual size.
 |
| Patrick Rochon's Light painting over a car |
There is a sense of space in this Picture because the car is in the middle of the page with the surrounding area being black. The lights are quite bright, as if to create the effect of wind blowing over the top of the car. This is effective because the the lights also reflect of the car bonnet, highlighting the front of the car and leaving the rest of the car to fade to the blackness. The picture is big itself is quite big as the car in the middle is quite big. If the car was smaller, then the artwork would be condensed and not as effective because the lights are making the car look elongated and longer than it really could be. The colour is quite bright compared the background to obviously be able to be seen and effective the same time.
This work seems to be a landscape Photo and also, the theme could be cars and making advertising/ branding more effective and eye-catching like in the Honda Advert that Patrick Rochon did because it shows a false image that cars can go through light and create these light sources that are just really light painted over the top of the object.
I like this painting by Patrick Rochon because it's quite simple yet it's effective because of the colours that he has used over a dull object (In my opinion) and using a black background gives the effect that it's just coming out of the darkness to be surrounded with light and joyfullness. Also, it looks like it has been elongated and stretched past it's usual size.
Thursday, 5 January 2012
How does Patrick Rochon create his work?
Patrick Rochon uses his friends, in total darkness to create his light paintings using a range of different light tools, like single LED lights or a block of flashing lights to create different effects. Also he tells his friends not to move but they can breathe. He uses a camera on a long exposure setting so that he can create the light paintings.
He used 2 guys that he found at an Opening in Tokyo that were covered in white and dressed in nearly nothing and they started to collabrate. Their presence was so strong that he found that the light just came out.
Patrick Rochon began to work on a series with nudity and he uses thin lines for the body so that the audience can see that the body is lit but hidden at the same time. It shows of the body as much as it hides it.

Friday, 30 December 2011
Patrick Rochon - Light photography
 |
| Deep sea predator and prey - Patrick Rochon's Website |
 |
| Fire tail dragon - Patrick Rochon's Website |
 |
| Fashion through the eye of Light - Patrick Rochon's Website |
 |
| Fashion through the eye of light - Patrick Rochon's Website |
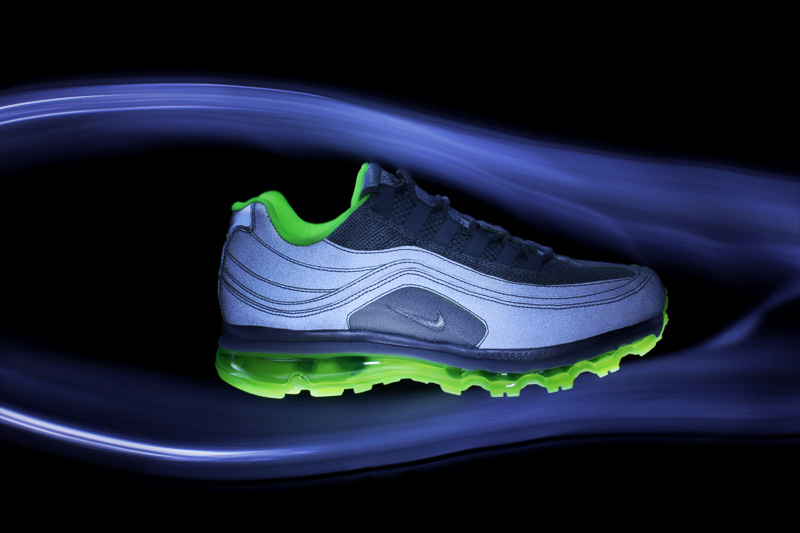
 |
| Sports Shoe Light painting - Patrick Rochon's Website |
 |
| Sports Show Light painting - Patrick Rochon's Website |
These are only a small selection from his website. There is more on his website in the different portfolios online.
Sunday, 11 December 2011
Lighting Research - Types of lighting that can be effective
Back lighting –
Back lighting can help to add drama to an image and also can show delicacy of a subject. The way that backlighting works is where the lighting instrument, whether it be natural or artificial light, and the viewer are facing towards each other with the subject in between. This should cause the edges of the subject to glow while other areas surrounding the subject to become dark or darken in contrast to the light.
A Fill Flash may be used with a back lit subject to give even more lighting.
 |
| Digital Photography School |
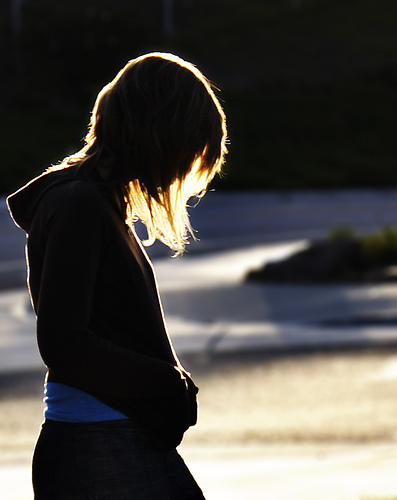
Front Lighting –
Front lighting is used to light up the front of the subject for visibility and also to illuminate the colours that they are wearing on the person or their face if it’s a medium close-up. The flash on a camera is the most common type of front light there is. This type of lighting provides the most detail towards the camera of the subject which is directly opposite and that it is the easiest type of lighting to deal with because there are fewer shadows to confuse with the cameras light meter.
 |
| Front lighting of a lady with an Apple. |
Soft Lighting –
The term Soft Lighting refers to light that tends to ‘wrap’ around the subject or objects which casts shadows that have a soft edge to them. The softness of the light depends on two factors: The Distance that it is shot from, closer to the light source, the softer it becomes and the Size of the Light Source, the larger the source the softer it becomes. Portrait's generally use this sort of lighting unless it's a specific scene that Soft light is seen best lighting to use.
 |
| Soft light on a Sea Breeze |
Hard Lighting –
Hard lighting is light that comes from a single point source, for example a light bulb, and falls directly onto the subject without being reflected off another surface. It produces dark shadows and produces very high contrast pictures with deep blacks and bright highlights. The shadows generally have a hard or distinct edge. On models, using this sort of lighting will make the eyes look deeply set into the face and blemishes stand out more to the viewer. This sort of light can also be used for Landscapes, to capture the different curves and contours of the landscape instead of Soft light which would tend to make it look and feel flat.
 |
| Hard Light on Still life of Tomatoes |
Studio Lighting –
Studio lighting isn’t a scientific process and there is no right or wrong way to set up studio lights. Although there may not be a ‘correct’ way to set things up, it’s important to understand the different aspects of studio lighting. Most used lights in studio lighting for photographs are tungsten, fluorescent, HMI and Strobe. All these, excluding Strobe which is used in flash lighting, are typically used in Continuous lighting. Umbrellas and Soft boxes are the most common tools to use with Studio lighting. They both affect the light source they are attached to changing the way that the light affects the subject. The umbrellas reflect light back onto a subject but also diffuse it to create other lighting effects. Soft Boxes are used to provide a strong diffusion of light projection onto the subject. These two tools are the key to removing unwanted shadows.
 |
| The equipment used for Studio Lighting. |
Natural Lighting –
Natural lighting can mean either Sunlight or Moonlight. Both are good ways of capturing different moments in the seasons and different points in life or just times of the day. For example, in Sunlight, you can capture the summer days when everyone is playing or reading a book with the sunlight behind them acting as a natural back light for the photo or moonlight when you are looking up to the sky to see if there really is that man in the moon and the light from the moon is shining out, giving a nice natural lens flare in your camera lens. Or both Sunlight or moonlight can be used during Winter to get the natural sparkle from the snow, whether the sunlight is a dim yet powerful light to still make the snow sparkle or the moonlight is bright and makes the snow seem like it is a High-Visibility object.
 |
| Sunlight glancing down on a winters day tree. |
Torch Lighting –
This technique is known as painting with light, allowing us to illuminate precise areas of the chosen subject by pointing directly at the subject with your torch to create a spotlight effect on the specific area of your choice. The trick is to build up on the amount of light on the subject so that it is correctly exposed. This sort of technique can be used with any camera but working with Digital is much better than film because the exposure time and you need a bracket to stand more chance of getting good prints.
Laser Lighting –
This technique is also called Painting with light and this gives great results because it’s using Laser pens which come in a variety of colours. Once more, a Digital camera would be the better out of the two main cameras (DSLR and SLR) as you can see what you have created and then go back if there are any mistakes. Dark spaces are ideal for this sort of ‘painting’ because you don’t want any unwanted light sources interfering with your photograph.

Subscribe to:
Comments (Atom)