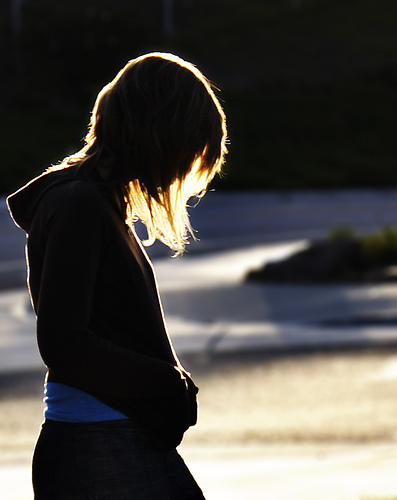
Friday 30 December 2011

Patrick Rochon - Light photography

Deep sea predator and prey - Patrick Rochon's Website
Fire tail dragon - Patrick Rochon's Website
These pictures are really effective yet simple because Patrick Rochon just uses one main colour (red) and makes a picture out of a few swirls and leaves the imagery to someones imagination if it wasn't titled. Also, in the Fire tail dragon photo there is a hint of a lighter colour like white/ peach colour on some of the edges to define certain points if to make them more pointy. In the first photo, there is little hints of white to suggest there is an animal there, but because it seems like it's facing us head on then it is used to portray this fact.
Fashion through the eye of Light - Patrick Rochon's Website
Fashion through the eye of light - Patrick Rochon's Website
Fashion through the eye of light is really nice and these are more like a fashion shoot and Patrick Rochon   uses mainly a pink background with the hint of blue in the corners and using a white light around the model to make her look retro/ vintage and to bring her face out of the background instead of covering her completely in colour. The first photo to do with fashion sets a rather moody tone yet using bright colours around her, makes her blend slightly into the background and again using the white light shone onto her face to make it look like she's wearing a white mask or white face make-up.
Sports Shoe Light painting - Patrick Rochon's Website
Sports Show Light painting - Patrick Rochon's Website
The picture of the last trainer are good because it looks like the trainer is moving through the picture and the light is just gliding over the top of the shoe itself so it looks realistic and not something that has been 'painted' on top of the image. The only way you can tell that the shoe has been painted over is because the soles and the inside of the shoe have been re-painted over to give of a green neon glow. The first trainer looks like it is falling through air and Patrick Rochon has given the 'air' a glow to suggest it's glow in the dark but really he's just used different colour laser pen over the top and made the blur of the pens mix together to give the motion effect.

These are only a small selection from his website. There is more on his website in the different portfolios online.

Sunday 11 December 2011

Lighting Research - Types of lighting that can be effective

Back lighting –

Back lighting can help to add drama to an image and also can show delicacy of a subject. The way that backlighting works is where the lighting instrument, whether it be natural or artificial light, and the viewer are facing towards each other with the subject in between. This should cause the edges of the subject to glow while other areas surrounding the subject to become dark or darken in contrast to the light.
A Fill Flash may be used with a back lit subject to give even more lighting.

Digital Photography School
Front Lighting –

Front lighting is used to light up the front of the subject for visibility and also to illuminate the colours that they are wearing on the person or their face if it’s a medium close-up. The flash on a camera is the most common type of front light there is. This type of lighting provides the most detail towards the camera of the subject which is directly opposite and that it is the easiest type of lighting to deal with because there are fewer shadows to confuse with the cameras light meter.
Front lighting of a lady with an Apple.


Soft Lighting –

The term Soft Lighting refers to light that tends to ‘wrap’ around the subject or objects which casts shadows that have a soft edge to them. The softness of the light depends on two factors:  The Distance that it  is shot from, closer to the light source, the softer it becomes and the Size of the Light Source, the larger the source the softer it becomes. Portrait's generally use this sort of lighting unless it's a specific scene that Soft light is seen best lighting to use.

Soft light on a Sea Breeze
Hard Lighting –

Hard lighting is light that comes from a single point source, for example a light bulb, and falls directly onto the subject without being reflected off another surface. It produces dark shadows and produces very high contrast pictures with deep blacks and bright highlights. The shadows generally have a hard or distinct edge.  On models, using this sort of lighting will make the eyes look deeply set into the face and blemishes stand out more to the viewer. This sort of light can also be used for Landscapes, to capture the different curves and contours of the landscape instead of Soft light which would tend to make it look and feel flat.
Hard Light on Still life of Tomatoes
Studio Lighting –

Studio lighting isn’t a scientific process and there is no right or wrong way to set up studio lights. Although there may not be a ‘correct’ way to set things up, it’s important to understand the different aspects of studio lighting. Most used lights in studio lighting for photographs are tungsten, fluorescent, HMI and Strobe. All these, excluding Strobe which is used in flash lighting, are typically used in Continuous lighting. Umbrellas and Soft boxes are the most common tools to use with Studio lighting. They both affect the light source they are attached to changing the way that the light affects the subject. The umbrellas reflect light back onto a subject but also diffuse it to create other lighting effects. Soft Boxes are used to provide a strong diffusion of light projection onto the subject. These two tools are the key to removing unwanted shadows.
The equipment used for Studio Lighting
Natural Lighting –

Natural lighting can mean either Sunlight or Moonlight. Both are good ways of capturing different moments in the seasons and different points in life or just times of the day. For example, in Sunlight, you can capture the summer days when everyone is playing or reading a book with the sunlight behind them acting as a natural back light for the photo or moonlight when you are looking up to the sky to see if there really is that man in the moon and the light from the moon is shining out, giving a nice natural lens flare in your camera lens. Or both Sunlight or moonlight can be used during Winter to get the natural sparkle from the snow, whether the sunlight is a dim yet powerful light to still make the snow sparkle or the moonlight is bright and makes the snow seem like it is a High-Visibility object. 
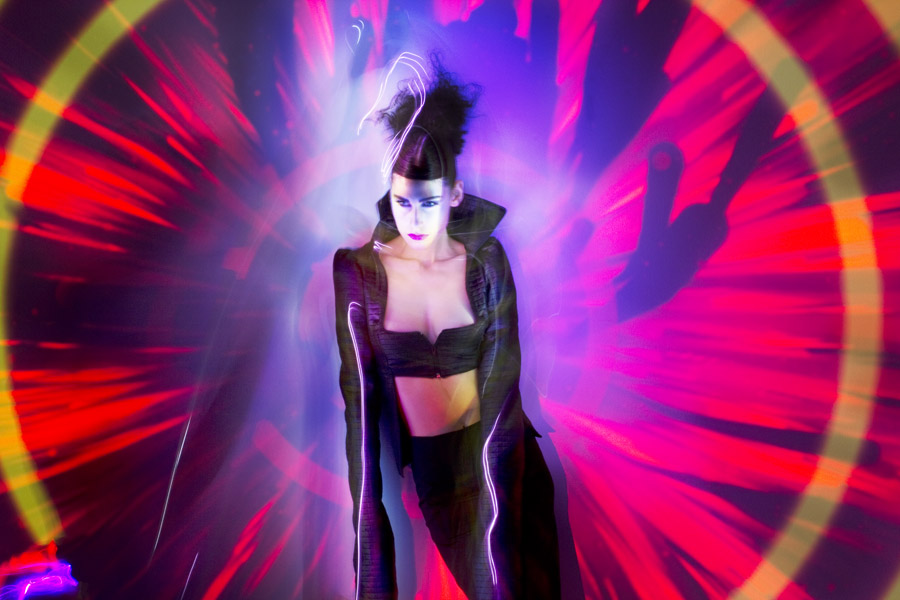
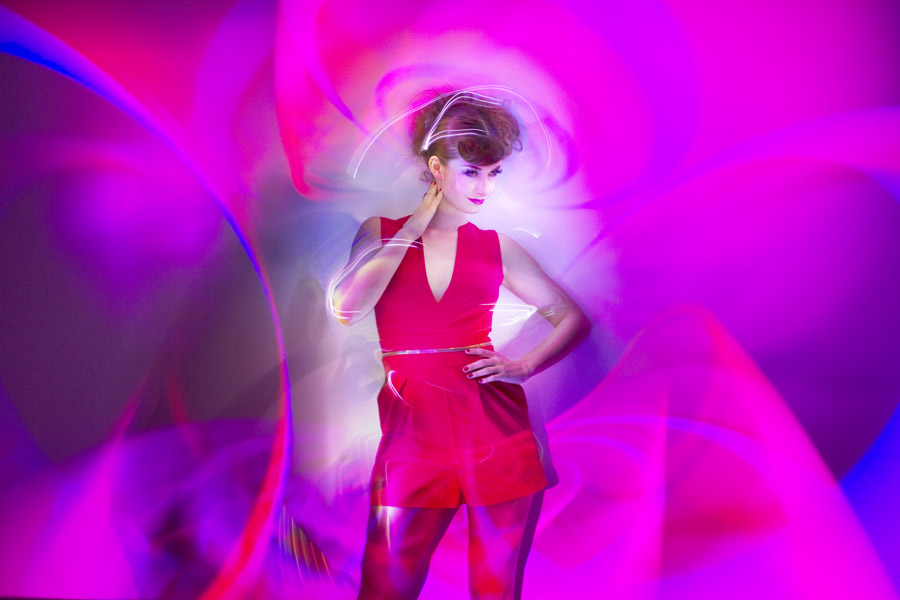
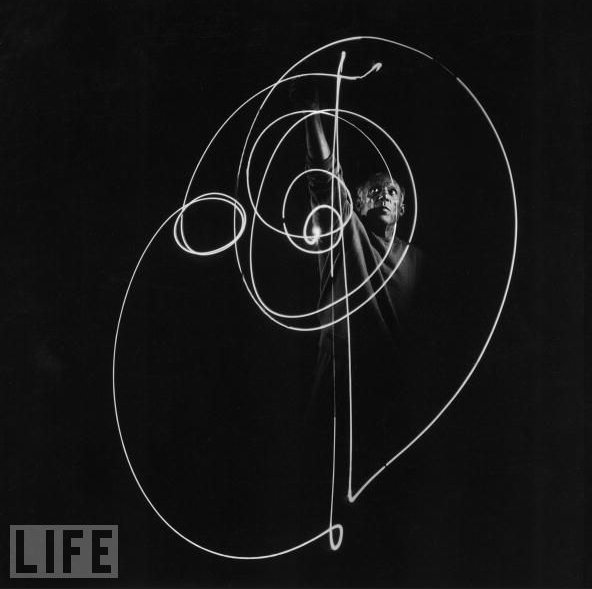
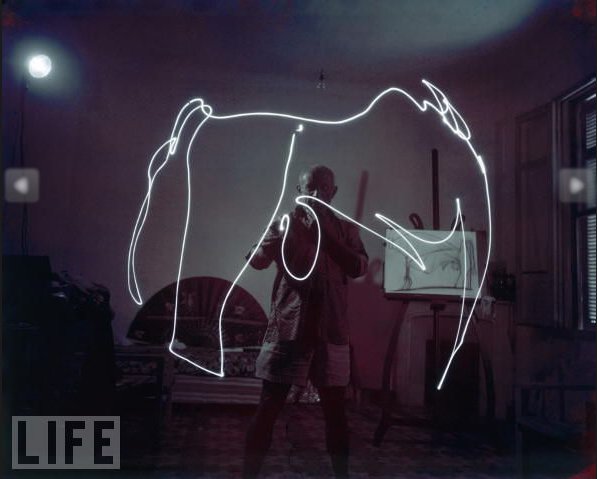
Sunlight glancing down on a winters day tree.
Torch Lighting –

This technique is known as painting with light, allowing us to illuminate precise areas of the chosen subject by pointing directly at the subject with your torch to create a spotlight effect on the specific area of your choice. The trick is to build up on the amount of light on the subject so that it is correctly exposed. This sort of technique can be used with any camera but working with Digital is much better than film because the exposure time and you need a bracket to stand more chance of getting good prints.
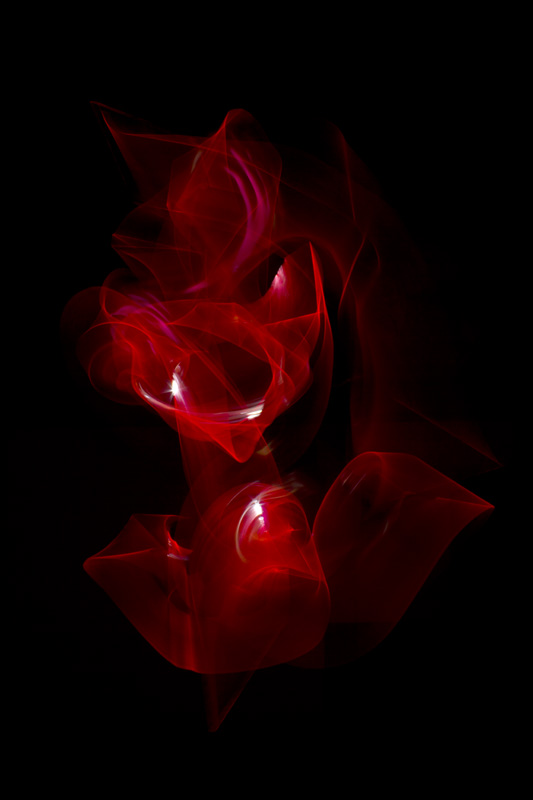
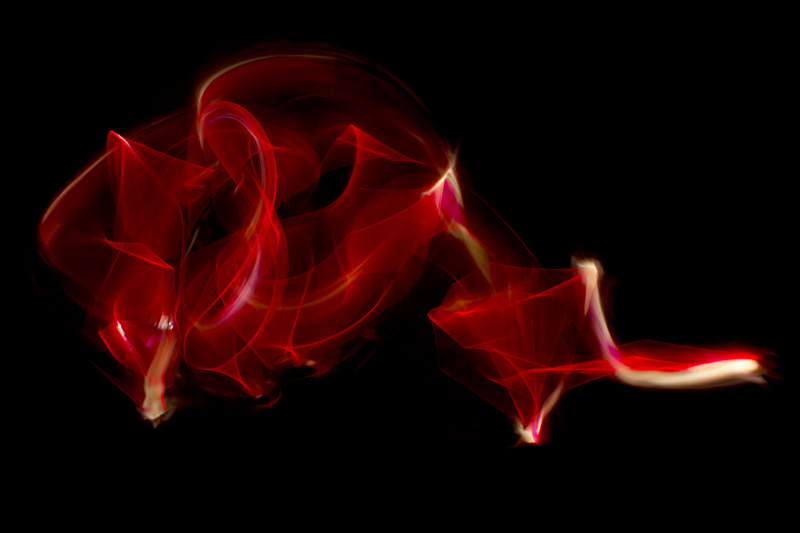
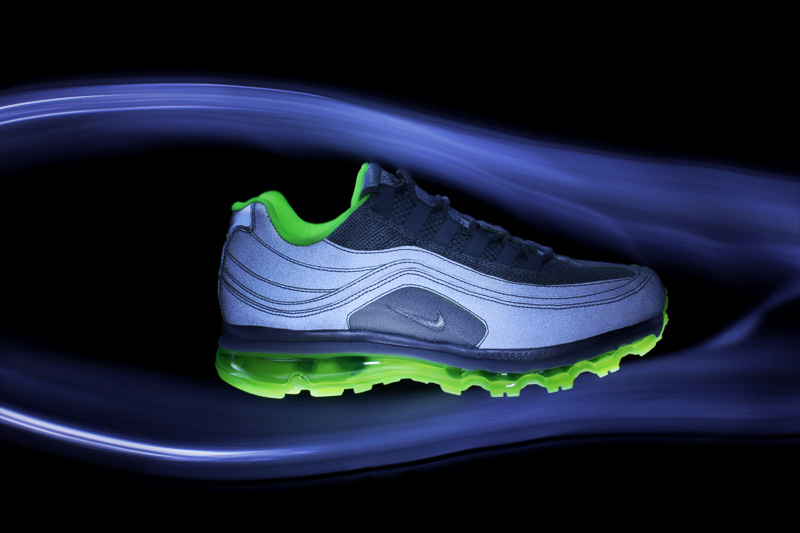
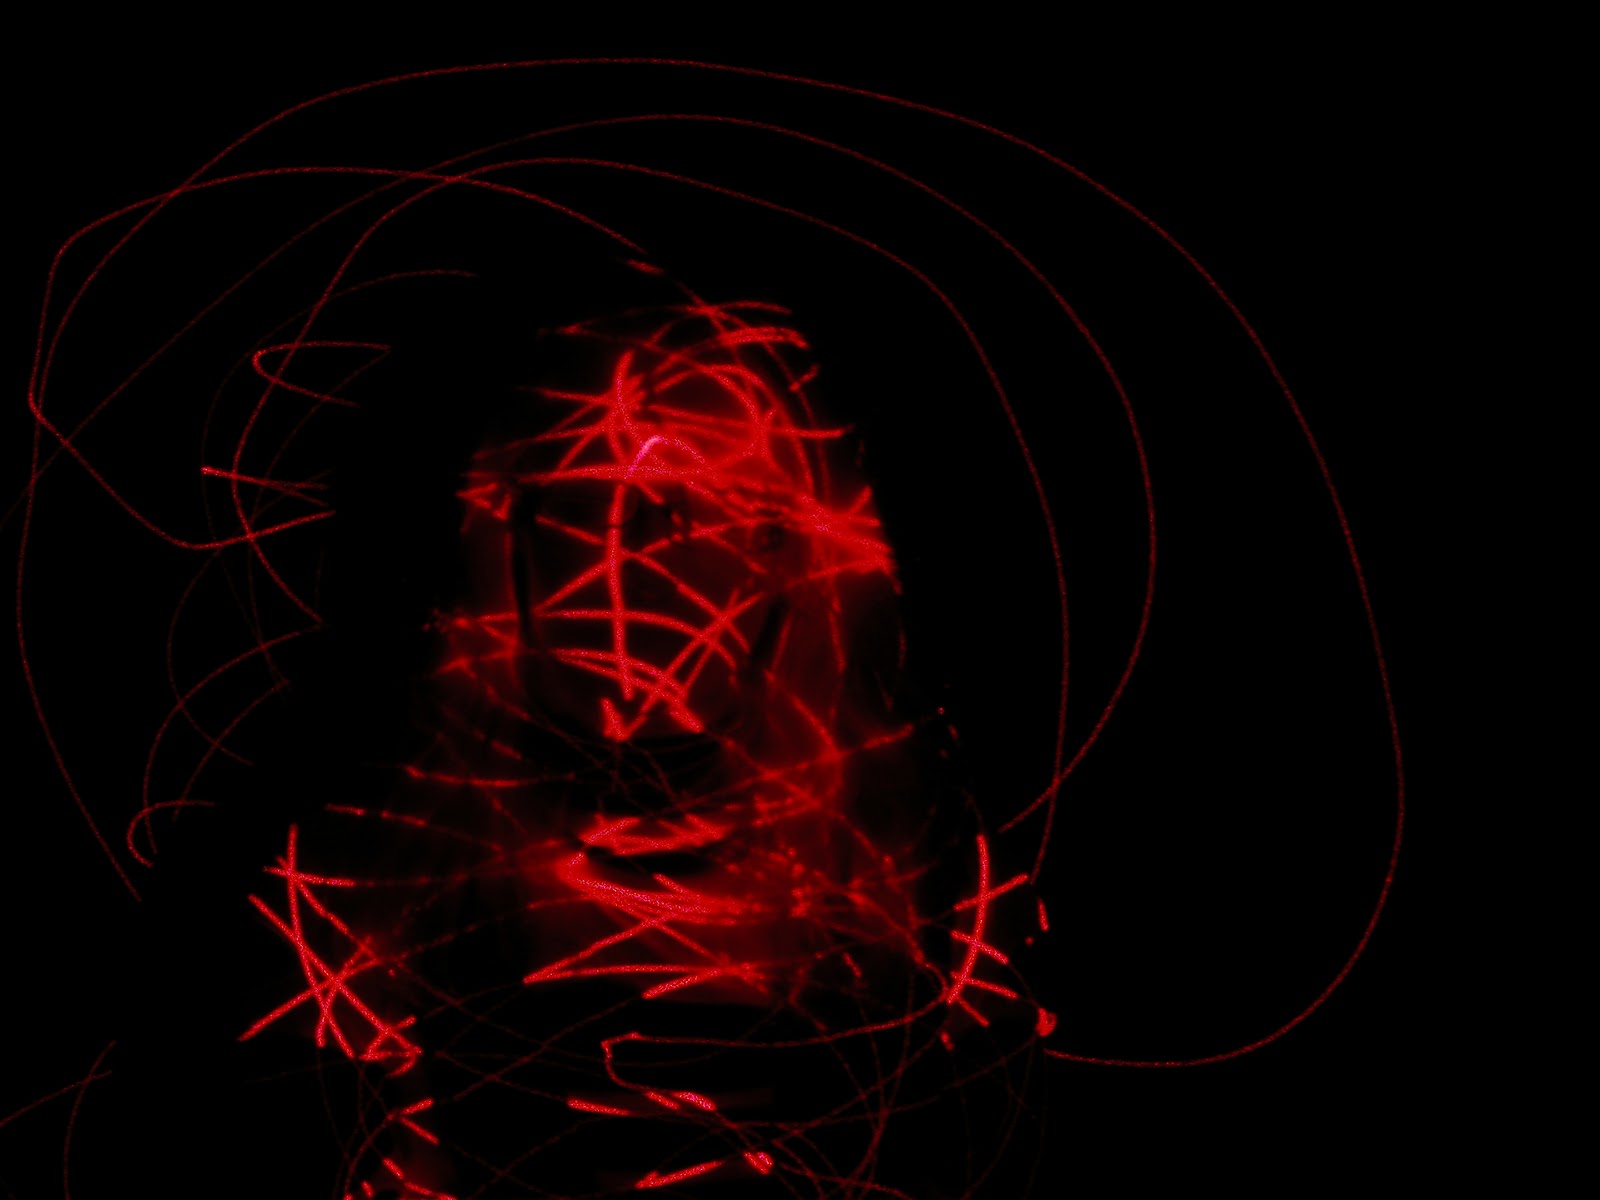
Laser Lighting –

This technique is also called Painting with light and this gives great results because it’s using Laser pens which come in a variety of colours. Once more, a Digital camera would be the better out of the two main cameras (DSLR and SLR) as you can see what you have created and then go back if there are any mistakes. Dark spaces are ideal for this sort of ‘painting’ because you don’t want any unwanted light sources interfering with your photograph.


Monday 5 December 2011

Photographs, Digital and SLR

Light in the front room (SLR Camera)
The effect of this really nice because it looks like there is loads of fog in the room and it gives a fog look to the room which dulls the light and doesn't make it so powerful.

Calendar, Blurring, No Flash. (SLR Camera)

Calendar, Blurring, No flash (SLR Camera)

Calendar, No blurring. No flash (SLR Camera)
Stairway, Top of the stairs. Blurring. Flash on. (Digital Camera)
This gives the idea that there could be a paranormal presence in the hallway (Where the shawdows are at the side of the staircase on either side)

Moon at night, with flash on. (Digital Camera)

All these photos that I have done I have accomplished with trial and error because on my digital camera I have an automatic flash to get the correct picture so at times I had to cover my flash to get the picture that I wanted yet have it in mostly focus, unless it was my second Digital picture where I had the blurriness of the window and the focus of the surroundings because this gave a really nice effect as the original picture was quite large.

Sunlight on a frosty day

Sunlight at a different angle

Close up of a flower covered in frost

Lookout over the Common covered in frost

Another lookout over the common with less sunlight. Covered in frost

Below are some light painting that we experimented with on a Digital camera.
1
This photo was just one of our testers because we were just using the pen to create light and if the light was picked up on the Digital Camera that we were using at the time.
2

3

4

5
This photo came out the best because of the brightness of the laser pen that we used and the design was picked up really quickly. We feel that this one worked really well and we all agreed that this was the best design.

These pictures were taken in the pitch black of the Dark Room to enhance the brightness of the Laser pen and when we used the green laser pen the beam was stronger than the red beam meaning that we were able to get a more of a design around the model. We were happy with our outcomes and we were especially happy with the design that came out when using the green laser pen because of it being strongest out of the two laser pens that we had been using.
I think that when we were doing the laser we should have spent more time on using the pens because we only managed to get a few pictures done with the laser pens because we were trying to get a decent picture and also trying to get a good laser pen to work properly without flickering on and off.


The above photos are my newest SLR pictures and the effect I got with these is a sort of Lomography effect because of my Camera. I really think this effect works with the pictures because it adds a 'paranormal' effect like something's been picked up by the camera that the eye can't see. I am really pleased with these outcomes, even if I didn't plan this to happen and I am glad that these photo's worked. Also, the second picture down is of a Christmas tree and I really like the warmth effect given because it looks like the tree is giving of an orange glow and it's lighting up it's surroundings. 

Tuesday 29 November 2011

Photographs. Digital, SLR and Photoshop experiments

Running water, edited in photoshop.

Still life, edited in Photoshop

Buried in dirt

The army in position
Light shining on the floor when it's raining


Three of these photos were taken with my Olympus Digital Camera (Small) and there was no flash. The picture of the Skull was taken by a Canon Digital Camera (Large) and therefore managed to get a clearer and more detailed shot. The light that has been captured on the last photo, was hard to get because of the flash that I have on my digital camera so I had to cover the flash up so that I got this effect because otherwise I would have gotten the street lit up.  I like this picture because the picture shows the streetlight from above that's shining on the floor with a nice spotlight.

Looking to the light
Plain look, Doll look

Evil grin


These two photos were taken by a SLR Camera with a roll of 24 and these two pictures stood out to me because they used a great contrast in light and with the bottom photo, I think that the light really brought out the details in her face.
-------


Party light

This edit of the party that I went to is really interesting because it makes it look like everyone is smoking when really they weren't. Although, I also think it doesn't look much like a real light painting so I think that if I was to re-do this photo I would use a different pathway to create a different light technique.

Skull light
This skull picture is really effective with the different hue on the background Layer to give the purple a chance to come to the surface and be brighter than the background. I quite like this picture and the effect that is given and if given a chance, I would most likely change the colour that I used around the picture.
Symmetrical Abstraction 
I really like this effect that has been given because the white in the middle of the picture looks like it's a pure white spotlight shining and giving out a shadow to the rest of picture which is blue. This is something that I followed a tutorial to do in my own time and I am quite pleased with the outcome that I received.

Sunday 27 November 2011

Pablo Picasso Analysis, AS Photography

Pablo Picasso was a Spanish painter, draughtsman and a Sculptor. Picasso is one of the most recognized figures of 20th-Century art and he is best known for co-founding the Cubist movement and for the wide variety of styles that are portrayed in his work. Among famous works of his, are the Proto-Cubist Les Demoiselles d’Avignon (1907) and Guernica (1937). He is not mainly known for his light paintings but they are also part his artwork. This work doesn’t fit in with the time that Picasso was in because it was a new/ more modern thing for photographers to do back during his time, but he was experimenting and exploring different ways of art/ photography.

The work seems to be at page size A4 but this could have come out differently if Picasso had worked to smaller sizes/ the size of the paper that had been given.  The process that was involved here was using a type of light pen to create certain effects given by the light pen he was using and the colour of the pen was white. I feel that the paintings with light weren’t structured because Picasso, in the pictures, look like he’s just experimenting making all sorts of lines join up together. But also, two of his photos could represent 1) an animal (e.g. a cow) and 2) a face that’s done without turning the light on and off.

This sort of work could be either landscape or portrait but the work of Picasso seems to be done as a landscape because there is loads of room either side of Picasso, showing the background and more space for him to create different effects for photographs. The only person that is involved in these photos is Picasso himself, showing what he is creating and how he’s creating it, with the aid of a slow shutter speed and a white laser pen.

I don’t know what to feel about Pablo’s work because it doesn’t look appealing for me, but it’s interesting in the way that he’s been able to create pictures with light because I thought that when using a sow shutter speed you still have to be quick because you may think that you will have long time to create a picture but the time goes quickly but this also depends on what sort of camera you have because different cameras have different versions of shutter speeds.